|
 |
This install takes 20 - 30 minutes.
Click on the images for larger views. |
IMPORTANT NOTE:
- If you have a knob that is integrated with the leather shift boot you will need to either cut the stock boot or purchase an aftermarket (such as Wheel Skins - see review and DIY) or BMW (from a model that does not have an integrated shift knob) boot. If you plan to cut the stock boot do so right below the knob and then follow the rest of this DIY.
|
Step 1: Getting the required items together
This install requires:
- 1 UUC Rob Knob III Illuminated Shift Knob Kit (includes knob, power converter, vampire clips)
- Philips Screwdriver
- 2.5 mm Allen Wrench
- Pliers
- Zip Tie
- A BMW M3 (E46).
- 20 - 30 minutes of free time.
|
 |
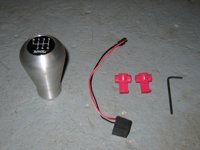
UUC Rob Knob III Kit |
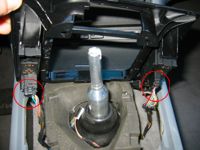
Step 2: Remove shift boot
- Carefully pull up the driver's side forward corner of the shift boot (see image).
- Once you have the corner released, work the rest of the way around the boot to release it completely
- Pull the shift boot up over the knob.
|
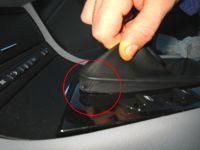
Removing the Shift Boot |
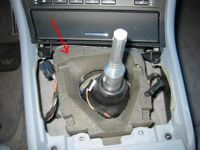
Step 3: Disconnect Power Lead and Remove Stock Knob
- Follow the wire that runs down from the stock knob to a connector.
- Disconnect the knob power wire from the car.
- Push the boot down to expose the knob.
- Using both hands, pull up on the stock knob to remove it - note: the knob is pretty tight, make sure not to smack yourself in the head with it once it releases from the shifter!
|
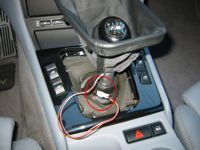
Location of the Power Wire |
Step 4: Removing the Center Trim and Insulation - Optional Step (to make your life easier - pictures for following steps assume that you did not skip this one)
- Remove the 2 screws at the back of the center panel.
- Disconnect the power window switch wiring (both sides).
- Remove the foam insulation piece (note its position)
|
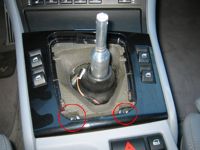
Center Trim Bolt Locations
Window Switch Wiring
Shifter Insulation |
Step 5: Connecting the Power Converter
- Using the provided vampire clips connect the power converter's white wire to the brown wire from the stock knob illumination lead (from step 3).
- Connect the red wire from the power converter to the red/white wire from the stock knob illumination lead.
- Hint: The Power Converter wires are stripped at the ends - when connecting via a vampire connector it is best to clip them flush with the wire's insulation or to just fold them back along the wire's length - otherwise the vampire connector will not hold the wire.
- TEST: Plug the power lead from the knob into the lead from the power converter. Turn on your lights and make sure the knob lights up before proceeding. It is hard to see the illumination in day light. If the knob does not light up, check the vampire clips. Unplug the knob and set aside.
|
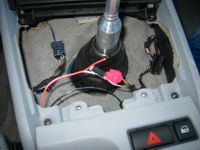
Power Connections |
Step 6: Re-Installing Center Panel and Insulation (assuming you did step 4 above - otherwise skip)
- Replace the shifter insulation - make sure that it is oriented properly.
- Run the power lead (2 black wires with a plug) from the power converter up through the center of the insulation piece.
- Reconnect the power window switches to the center panel.
- Re-install the center panel by screwing in the 2 screws at the back.
|
|
Step 7: Re-Installing the New or Altered Shift Boot
- Turn the boot inside out.
- Place the knob inside the boot and run the power lead from the knob through the top of the shift boot.
- Slide the top of the boot on to the shifter.
- Slide the knob on to the shifter (don't tighten it yet - if the knob is tight, make sure that the set screw at the bottom of the knob is not turned in - if it is, back it off with the 2.5mm allen wrench).
- Align the boot frame so it is in the correct position - does not have to be perfect - just close.
- Align the shift knob - does not have to be perfect - just close.
|
Inverted and Aligned Boot |
Step 8: Securing the Shift Boot and Connecting the Power Lead
- Push the knob down to seat the boot.
- Wrap a zip tie around the top of the shift boot and pull it tight.
- Trim the zip tie.
- Connect the power lead from the knob to the lead from the power converter.
- Test again as in step 5.
|
Connected Knob and
Zip Tie in Place |
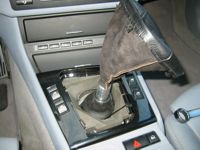
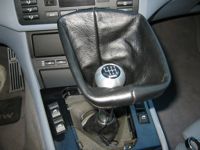
Step 9: Finishing Up
- Push the boot frame down and clip it into place.
- Line up the knob with the shift pattern as you want it.
- Push down on the knob and use the 2.5mm allen wrench to tighten it in place.
- You're done!
|
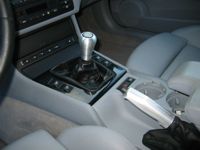
Installed UUC RKIII & E-Brake
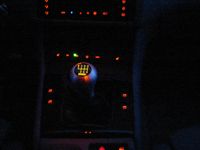
Night Shot |

|